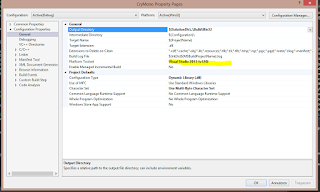
Update: The steps outlined in this tutorial may not apply to all versions of CryMono. In order to make sure you use the right version, see this post.
Righto, not technically Friday here anymore. But as long as I'm awake, it's still Friday to me.
This tutorial assumes that you have Visual Studio 2012 installed and have working knowledge of changing properties and basic programming in C++ and C#.
Setting up the latest CryEngine (3.5.8):
First of all, head over to
www.crydev.net and download the latest version of the CryEngine if you haven't already done so. Extract the files from a zip to a dedicated folder, this'll be referred to as <CryEngineFolder> during pathing instructions in this tutorial.
Navigate to <CryEngineFolder>\Code\Solutions and open GameCodeOnly.sln. Visual Studio will prompt you to update some of the solutions to the current version (2012), do this and then make the following changes:
- Right-click CryGameSDK and mark at is Startup Project
- Go to the CryGameSDK properties, Debugging and select the Command field. Edit it by browsing to: <CryEngineFolder>\Bin32\Editor.exe. This will launch the 32 bit editor whenever you choose to debug the project.
- If you're using Visual Studio Express, you'll need to delete GameDll.rc (found in the solution explorer under CryGameSDK\res).
Build the solution and run the debugger. If everything works without problems, then well done, you've just compiled your first CryGame. If not, leave a comment with whatever issue you're having (and make sure you've done all of the above).
NOTE: You'll likely (nearly 100% certain) encounter a CryAssert Failure when launching the newly compiled editor. This is not a fatal error and can be ignored for now, but should be fixed before final release (details on this can be found on CryDev)
Downloading CryMono
Using GitBash:
Navigate to <CryEngineFolder>\Code and right-click in order to select GitBash. In the console enter: "git clone https://github.com/inkdev/CryMono
–recursive", note the double hyphen before 'recursive'. Let the program run to the end, this might take a while. Closing the program prematurely can and will lead to errors later on.
Manually:
Go to the
CryMono repository and download the project as ZIP file. Note that this won't include the contents of the 'mono' of the repository as that actually links to another repository. In order to get those contents, go to the
mono repository and download that project as a ZIP file as well.
Open the CryMono repository ZIP file and extract the contents of CryMono-master (the folder inside the ZIP file) to <CryEngineFolder>\Code\CryMono.
Next open the mono repository ZIP file and extract the contents of mono-master to <CryEngineFolder>\Code\CryMono\mono.
Compiling CryMono:
In order to use CryMono with the CryEngine, you'll need to compile it to a DLL file so that the engine can load its functionality. In order to do this, we'll need to edit a few things.
Go to <CryEngineFolder>\Code\CryMono\Solutions and open CryMono.sln. Update any files to VS2012 as needed. Then in the solution explorer navigate to: CryCommon\Interfaces_h\ISystem.h.
In this file, look for the SSystemGlobalEnvironment struct. At the end of this struct add:
"struct
IMonoScriptSystem* pMonoScriptSystem;"
According to the book I mentioned in an earlier post, this should be enough to compile CryMono. However, doing so now (with the current version being v0.7) will lead to abstract class instantiation errors. In order to fix this you must add a function to CMonoActor class:
In the solution explorer navigate to CryMono\ActorSystem\Actor.h. Then, in CMonoActor class, go to line 133 and add:
"virtual void OnReused(IEntity *, SEntitySpawnParams &) override {}"
Now you can build CryMono. The project is set up so that the DLL will appear in the Bin32 directory of your CryEngine structure.
Integrating CryMono with CryEngine:
Now comes the fun part, integrating CryMono into CryEngine and making the whole thing work.
Go back to (or re-open) GameCodeOnly.sln. In the CryGameSDK properties, go to C/C++, General and edit the "Additional Include Directories" field. Add a new line and enter: ..\..\CryMono\MonoDll\Headers. Save the properties and close the window.
In order for CryMono to start with the game, you'll eed to change the game startup files.
First, open up GameStartup.h, found in the solution explorer under CryGameSDK\Startup Files\. At the end of the CGameStartup class, add:
"static HMODULE m_cryMonoDll;"
Now open up GameStartup.cpp. After the include block, add:
"#include <CryMonoInitializationHelpers.h>"
Also in this file, just before the CGameStartup class function definitions add the following:
- "IMonoScriptSystem *IMonoScriptSystem::g_pThis = nullptr;"
- "HMODULE CGameStartup::m_cryMonoDll = 0;"
In order for the CryMono DLL to unload correctly when the game ends, go to the CGameStartup destructor and add the following:
"if(m_cryMonoDll)
{
CryFreeLibrary(m_CryMonoDll);
m_cryMonoDll = 0;
}"
Now navigate to the Init function of CGameStartup and add the following before REGISTER_COMMAND("g_loadMod", ...):
"m_cryMonoDll = InitCryMono(gEnv->pSystem, m_pFramework);"
Congratulations, the CryMono framework will now load at the beginning of the game and unload at the end. It won't load FlowNodes yet though, which requires some extra coding. For this, open up Game.cpp, which can be found in CryGameSDK\Game Files\.
In this file, after the include block, add:
"#include <IMonoScriptSystem.h>"
Now find the CGame::RegisterGameFlowNodes function and add the following to it:
"GetMonoScriptSystem()->RegisterFlownodes();"
You're now set to load custom made FlowNodes and use CryMono to its full extent. Build the project and test the editor. If you have any issues, leave a comment or head over to
CryDev.
NOTE: You might be welcomed by a CryMono exception, which states there's no scripts for it to compile in the GameSDK\Scripts\ folder. You can add a dummy .cs file to this folder and the error will go away.
Resources:


